SEO Saga: Keywords

There is a lot of talk around the decreasing importance of keywords in SEO strategies, but with all the tips and formulas for SEO success, nobody is able to preach the indexed heaven without a solid keyword foundation. Yes, their importance in higher search rankings is lower, but if your serious about SEO, keywords should still play an important role in your strategy.

SEO Keyword Definition

In terms of search engine optimization, a keyword is a word or phrase that summarizes the content of a page. When a search query is made, the keywords play an important factor in matching the result pages. Think of keywords as terms that translate your human readable and lovable content, for search engines to understand.

The synonym term “keyphrase” has recently become more and more used, and I personally prefer it since it is more descriptive.

Keyword Research Tips

Ask the questions your audience is asking.

Always choose your keywords with the targeted user/customer in mind. What is your audience searching for? What questions are they asking? The result should be a list of clear and relevant terms intended for humans and not search engine crawlers.

Be specific.

Although terms with a more general meaning might reach more people, your site could turn out in results from searches that are not related to your business. Also, it is very difficult to rank highly for general terms as they are very competitive.

Think in themes.

As the list of keywords will grow, defining a good content strategy will prove to be difficult if your keywords are bundled all together. As you will probably notice, different keywords are returning similar results in searches. Take a cue from this, and separate them according to your business needs.

Brainstorming a list of keywords

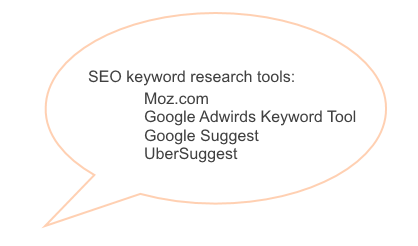
The first step to conquer this SEO pillar, would be to brainstorm a list of keywords you would want to use. Below are some places to get inspiration from:

  • Your own content
  • Marketing/sales materials
  • Words/phrases that best describe your product/service
  • Buy a list of keywords from an agency

Suggestion Tools

Keywords Selection

SERP = Search engine Results Pages

The list resulted in the previous step will turn out be significantly longer than you might have anticipated. Keyword stuffing your page  is no longer useful after the Google Panda and Google Penguin updates. Search engines are now smarter and will penalize your SERP. Edit your list down:

  1. Remove any terms that aren’t really related to your content.
    Example: In the case of this blog post, the keyphrase “seo keyword research usa” turned out as a suggestion in one of the keyword suggestion tools. It is an appealing term because of its low competition and the tool I used marked it as highly relevant. But is it really? It’s clear that the person searching this phrase is looking for country specific content and this isn’t the place to find it.
  2. Think about the right type of traffic you’ll want to attract.
    If one keyphrase appears to be very attractive (in terms of volume or competition) but you’re not sure if it fits your needs, think of your final SEO goal. Is it enough for you to attract as much traffic as possible, or do you want your user engaged in another way with your page.
  3. Volume and competition.
    The perfect keyphrase should be high in volume and low in competition. If a term is relevant and it appears to be popular in terms of volume, but everyone is using it, it will be very difficult to rank highly for it. The reverse of this logic is equally important. If the keyword doesn’t have a lot of competition, but almost nobody use it in search queries, there’s no point in using it.
  4. Look at the competition.
    Many SEO tools let you input your competitor URL and analyse the used keywords and how they are performing(Moz provides a good solution). Be careful to differentiate between your business competitors and your SEO competitors. While the first category is the one with whom you actively compete for customers/users, the SEO competitors should be the one you should focus on, even if you don’t have the same targeted audience.They are the ones that are ranking higher than you in search results, using your best keywords.
  5. Long-Tail Keyword = A targeted phrase, composed of 3 or more words. It is constructed around a generic keyword, called “head”, that turns a high search volume.

    Pursue Long-Tail Keywords.
    This is perhaps the smartest step you could make at this point. Take the road less traveled. There is no use in focusing in a competition for the keywords that flood the content of so many SEO conscious businesses. Long-tail keywords can help you rank higher and aren’t equally pursued.

Single Decimal Point

Among the first issues I encountered when working on a windows phone application was the simple, plain textbox. This apparently friendly control has a dark side in a particular use case. When the InputScope is set to Numerical, it allows entering multiple decimal points.

before

In my case, I didn’t needed this “feature”. The best solution I could find to limit the decimal point to one, or none, was to develop an attached behavior.

You can find the complete solution here.

Below is the behavior’s structure:

BehaviorStructure

The attached property IsDecimalPointAllowed will set the behavior to allow one or zero decimal points in the input.

public static readonly DependencyProperty IsDecimalPointAllowedProperty =
DependencyProperty.RegisterAttached("IsDecimalPointAllowed", typeof(bool?), typeof(DecimaPointBehavior), new PropertyMetadata(null, OnIsDecimalPointAllowedChanged));

public static bool? GetIsDecimalPointAllowed(DependencyObject obj)
{
  return (bool?)obj.GetValue(IsDecimalPointAllowedProperty);
}

public static void SetIsDecimalPointAllowed(DependencyObject obj, bool? value)
{
  obj.SetValue(IsDecimalPointAllowedProperty, value);
}

When the attached property is set to true or false, the value of the regex is established.

  • For limiting the input to allow only one decimal point:
"^([0-9]+)?([,|\.])?([0-9]+)?$"
  • For limiting the input to block any decimal point:
"^([0-9]+)?$"


When the text inside the textbox changes, the new value is matched against the established regex:

private static void textBox_TextChanged(object sender, TextChangedEventArgs e)
{
 var textBox = (TextBox)sender;
 var match = Regex.Match(textBox.Text, regex);
 if (!match.Success)
 {
   textBox.Text = textBox.Text.Remove(textBox.Text.Length - 1);
   textBox.Select(textBox.Text.Length, 0);
 }
}


For no decimal point allowed, set the IsDecimalPointAllowed to false:

<TextBox Height="100"
InputScope="Number"
behaviors:DecimaPointBehavior.IsDecimalPointAllowed="False" />;

NoDecimalPoint

For one decimal point allowed, set the IsDecimalPointAllowed to true:

<TextBox Height="100"
InputScope="Number"
behaviors:DecimaPointBehavior.IsDecimalPointAllowed="True" />;

OneDecimalPoint

Beautiful, unique strings

There may come a time in your career when you will have to solve the issue of finding the most beautiful and unique string from an input, or else!…OK, I admit the probability of this is very low, but if you are interested in solving a brain-teasing problem, here is you’re chance.

Problem:
1. String s is called unique if all the characters of s are different.
2. String s2 is producible from string s1, if we can remove some characters of s1 to obtain s2.
3. String s1 is more beautiful than string s2 if the length of s1 is greater than the length of s2 or, if they have equal length, if s1 is lexicographically greater than s2.
Given a string s, you have to find the most beautiful and unique string that is producible from s.

Solution:
Here are the main ideas behind the solution:

  1. Let the input and the output strings be represented as “I[]” and “O[]”.
  2. For each character “c” from the input string I[], do the following validations:
    1. If c is not found in O[], append c to O[]
    2. If c already exists in O[]:
      1. Let “p” be the position of the character c in O[], and “ip” be the position of the character in I[]
      2. Find the first character in O[], placed after the position p, that is lexicographically greater than c
          1. If no such character is found,do nothing and continue with the next character validation from the input string
          2. If there is such character:
            1. Let’s remember it’s position in “gp”
            2. Take all the characters from O[], that are found between the positions p and gp
            3. If all of these characters are founded in I[] after the position ip, remove the character from O[] at position p and append the character at the end of O[]

Here is the implementation in C#: sources

Example:
I = “ccabdcab”
O = “”

  1. c = ‘c’
    Character not found in O
    O = “c”
  2. c = ‘c’
    Character already in O.
    p = 0;
    No greater character is found in O after p => do nothing.
    O = “c”
  3. c = ‘a’
    Character not found in O
    O = “ca”
  4. c = ‘b’
    Character not found in O.
    O = “cab”
  5. c = ‘d’
    Character not found in O.
    O = “cabd”
  6. c = ‘c’
    Character already in O.
    p = 0;
    ip = 5;
    A greater character (‘d’) is found in O at position gp = 3.
    All the characters between p and gp (‘a’,’b’) are found in I[] after the position ip = 5. This means that these characters will be validated and moved later in the process, and therefore the character from the position p can be safely removed from O.
    O =”abdc”
  7. c = ‘a’
    Character already in O.
    p=0;
    ip=6
    p = 0;
    A greater character (‘b’) is found in O at position gp = 1. Since there is no smaller character between ‘a’ and ‘b’ in the output string, the character ‘a’ can be safely removed from the position p=0, and appended at the end of O.
    O = “bdca”
  8. c = ‘b’
    Character already in O.
    p = 0;
    A greater character (‘d’) is found in O at position gp = 1. Since there is no smaller character between ‘b’ and ‘d’ in the output string, the character ‘b’ can be safely removed from the position p=0, and appended at the end of O.
    O = “dcab”

And since everybody is going bananas associating the following two examples with this problem, here is the generated output in those cases, following this solution:

Input: babab 
Output: ba

Input: nlhthgrfdnnlprjtecpdrthigjoqdejsfkasoctjijaoebqlrgaiakfsbljmpibkidjsrtkgrdnqsknbarpabgokbsrfhmeklrle 
Output: tsocrpkijgdqnbafhmle

Watermark Behavior

There are a lot of scenarios where you have to apply a watermark on a WPF control. Since there is no such functionality on the standard WPF controls, the WPF Control Toolkit provides an extended text box that meets the requirements.

This was hardly sufficient in my case and of course, I thought I can do better.

I developed an attached behavior instead, since I wanted to apply the watermark on multiple types of control. Also, I intended to keep some elements of the original background in sight, so a lot of the code written is focused in that direction.

You can download the complete solution from here.

WatermarkedTextBox

For the above textbox, the XAML code looks like this (after defining the namespace where the behavior is located):

 <TextBox Height="23"
                 local:WatermarkBehavior.IsWatermarkEnabled="True"
                 local:WatermarkBehavior.WatermarkText="Watermark"
                 Background="Gold"
                 Name="textBox1"
                 Width="120"/>

Let’s have a look of the implementation.

First of all, there are a couple of attached properties registered:

Property for enabling the watermark:

 public static readonly DependencyProperty IsWatermarkEnabledProperty =
    DependencyProperty.RegisterAttached("IsWatermarkEnabled", typeof(bool), typeof(WatermarkBehavior), new UIPropertyMetadata(false, OnIsWatermarkEnabled));

Property for defining the text that will appear as watermark:

 public static readonly DependencyProperty WatermarkTextProperty =
            DependencyProperty.RegisterAttached("WatermarkText", typeof(string), typeof(WatermarkBehavior), new UIPropertyMetadata(string.Empty));

The watermark can be a different element, not just text. This property defines the UIElement that will be placed as watermark:

public static readonly DependencyProperty WatermarkUIElementProperty =
            DependencyProperty.RegisterAttached("WatermarkUIElement", typeof(UIElement), typeof(WatermarkBehavior), new UIPropertyMetadata(null));

Here an example for using this property:
ComplexWatermark

<RichTextBox local:WatermarkBehavior.IsWatermarkEnabled="True"
                     Height="100"
                     Name="richTextBox1"
                     Width="214">
            <local:WatermarkBehavior.WatermarkUIElement>
                <StackPanel Orientation="Horizontal">
                    <Label Content="watermark"/>
                    <Image Source="http://www.osa-opn.org/opn/media/Images/ImageOfTheWeek/12-10-22.jpg?width=1024&amp;height=1024&amp;ext=.jpg"/>
                </StackPanel>
            </local:WatermarkBehavior.WatermarkUIElement>
        </RichTextBox>

Property for defining the property of the control that is checked before applying the watermark. If this property is not set, a couple of predefined properties are checked.

         public static readonly DependencyProperty WatermarkPropertyProperty =
            DependencyProperty.RegisterAttached("WatermarkProperty", typeof(string), typeof(WatermarkBehavior), new UIPropertyMetadata(string.Empty));

An example is the watermarked button used above:

 <Button local:WatermarkBehavior.IsWatermarkEnabled="True"
                local:WatermarkBehavior.WatermarkText="Watermark"
                local:WatermarkBehavior.WatermarkProperty="Content"                
                Height="23"                
                Name="button1"
                Width="120" />

Setting the property IsWatermarkEnabled to true will register the handlers for the Loaded, GotFocus and LostFocus events of the control:

        private static void OnIsWatermarkEnabled(DependencyObject d, DependencyPropertyChangedEventArgs e)
        {
            var frameworkElement = d as FrameworkElement;
            if (frameworkElement == null)
            {
                return;
            }

            var isEnabled = (bool)e.NewValue;
            if (isEnabled)
            {
                // hook to the events of the control
                frameworkElement.GotFocus += ControlGotFocus;
                frameworkElement.LostFocus += ControlLostFocus;
                frameworkElement.Loaded += ControlLoaded;
            }
            else
            {
                // unhook to the events of the control
                frameworkElement.GotFocus -= ControlGotFocus;
                frameworkElement.LostFocus -= ControlLostFocus;
                frameworkElement.Loaded -= ControlLoaded;
            }
        }

The class ControlBackground holds the logic of the background creation:
ControlBackgroundClassDiagramThis class contains the property WatermarkLabel, which will be used when applying the watermark in the behavior class.
Also, the class stores the original background of the control. This way, when the watermark is no longer needed, the control’s background can return to it’s original state.
The behavior class holds a list of ControlBackgrounds. Every time a control is loaded, the original background is stored in a new record of this list that also holds the correspondent watermark.

private static readonly List OriginalTextBoxBackgrounds = new List();

private static void ControlLoaded(object sender, RoutedEventArgs e)
        {
            var control = sender as Control;
            if (control == null)
            {
                return;
            }

            // Save the original look of the control
            var newControlBackground = new ControlBackground
                                           {
                                               Control = control,
                                               OriginalBackground = control.Background
                                           };
            CreateWatermark(newControlBackground);
            OriginalTextBoxBackgrounds.Add(newControlBackground);
            var stringProperty = GetWatermarkProperty(control);
            var propertyIsEmpty = string.IsNullOrWhiteSpace(stringProperty) ? CheckDefaultPropertiesEmptyOrNull(control) : PropertyIsEmpty(control, stringProperty);
            if (propertyIsEmpty)
            {
                ApplyWatermark(control, newControlBackground.WatermarkLabel);
            }
        }

The watermark is created by changing the background of the control with a new VisualBrush that has the Visual of this label.

 private static void ApplyWatermark(Control control, Label label)
        {
            var customVisualBrush = new VisualBrush { Stretch = Stretch.None, Visual = label };
            control.Background = customVisualBrush;
        }

The watermark is applied when the control is loaded and when it has lost the focused. When the control is focused, the background must return to the original value:

 private static void ControlLostFocus(object sender, RoutedEventArgs e)
        {
            var control = sender as Control;
            if (control == null)
            {
                return;
            }

            var stringProperty = GetWatermarkProperty(control);
            var propertyIsEmpty = string.IsNullOrWhiteSpace(stringProperty) ? CheckDefaultPropertiesEmptyOrNull(control) : PropertyIsEmpty(control, stringProperty);

            if (!propertyIsEmpty)
            {
                return;
            }

            var controlBackground =
                OriginalTextBoxBackgrounds.FirstOrDefault(cb => cb.Control.GetHashCode() == control.GetHashCode());
            if (controlBackground != null && controlBackground.WatermarkLabel != null)
            {
                ApplyWatermark(control, controlBackground.WatermarkLabel);
            }
        }

 private static void ControlGotFocus(object sender, RoutedEventArgs e)
        {
            var control = sender as Control;
            var dependencyPropertyName = GetWatermarkProperty(control);
            if (control == null)
            {
                return;
            }

            var hashCode = control.GetHashCode();
            var controlBackground = OriginalTextBoxBackgrounds.FirstOrDefault(cb => cb.Control.GetHashCode() == hashCode);

            if (string.IsNullOrWhiteSpace(dependencyPropertyName) && controlBackground != null)
            {
                control.Background = controlBackground.OriginalBackground;
            }
        }

In the case of lost focus, before applying the watermark, the property provided in WatermarkProperty is checked for it’s default value. If no property is provided, a few default properties are checked:

 private static bool CheckDefaultPropertiesEmptyOrNull(Control control)
        {
            // For Password
            var passwordPropertyInfo = control.GetType().GetProperty("Password");
            if (passwordPropertyInfo != null && passwordPropertyInfo.GetValue(control, null).ToString() == string.Empty)
            {
                return true;
            }

            // For rich textbox
            var richTextBoxPropertyInfo = control.GetType().GetProperty("Document");
            if (richTextBoxPropertyInfo != null)
            {
                var richTextBoxvalue = richTextBoxPropertyInfo.GetValue(control, null) as FlowDocument;
                if (richTextBoxvalue != null)
                {
                    var textRange = new TextRange(richTextBoxvalue.ContentStart, richTextBoxvalue.ContentEnd);
                    if (string.IsNullOrWhiteSpace(textRange.Text))
                    {
                        return true;
                    }
                }
            }

            // For Selector
            var comboboxPropertyInfo = control.GetType().GetProperty("SelectedItem");

            if (comboboxPropertyInfo != null && comboboxPropertyInfo.GetValue(control, null) == null)
            {
                return true;
            }

            // For textbox
            var textPropertyInfo = control.GetType().GetProperty("Text");
            return textPropertyInfo != null && textPropertyInfo.GetValue(control, null).ToString() == string.Empty;
        }

For any improvements or issues of this solution, please feel free to comment.

Unit. Integration. Acceptance.

Confused about which kind test to implement in your development process?

The following types of tests are complementary. Some of them address the system from the user’s perspective, others form the developer’s point of view. This is why I don’t know many practical cases where focusing on one type of testing  is sufficient.

Unit Testing

As the name suggests this type of test is performed for the smallest units of source code.

UnitTest
Characteristics:

  • Simple as possible
  • Repeatable
  • Consistent
  • Fast execution
  • Easy to debug
  • Few external factors
Because of these characteristics, some restrictions emerge when creating unit tests.

Restrictions:

  • Don’t access the network
  • Don’t spin up a thread
  • Don’t use the file system
  • Don’t use the database
  • … in short, don’t use any dependency when it’s initialization or manipulation is not straight forward or it’s time consuming. If any such dependency is needed in your unit tests, mocking is the way to go.

The shortcoming of this type of testing is that it addresses small blocks of functionality. The unit tests don’ t cover the aspects of how the entire system performs.

Integration Testing

This type of tests is build upon the unit tests. It concerns the system resulted as the combined blocks of code, that were already tested with unit tests..
It’s main advantage is that it can find bugs produced by the environment.

IntegrationTestsCharacteristics:

  • Can use threads
  • Can use system dependent values that change dynamically (such as DateTime.Now)
  • Can use external dependencies
  • Can access the network
  • …can use whatever is required to ensure the correct functionality of all the code, in whatever production environment.
The shortcoming of this type of testing is that they don’t test the complete desired functionality. The code works fine in the tested environments, but did we implemented all the desired features? This is why a third type of testing is needed.

Acceptance Testing

AcceptanceTests

These are the tests which ensure that the program provides the functionality the end user is expecting. The term “executable specifications” is often used to describe this kind of tests.

The tests are made based upon the user stories and address the system as a black-box  If the acceptance tests pass, it means that the program meets the user requirements.

Of course, there are a lot more type of tests than the ones this post concerns. However, when building the foundation of testing the source code, I think a good starting point is provided by the above three.

Timeout Dictionary

Warning: If you ever plan to open this kind of subject with your geek mates, be prepared for endless discussions regarding performance issues, “thread safe”-ing and other related subjects.

When dealing with large chunks of data, it might be a good idea to erase some of it once in a while, when is no longer needed. In my case I was continuously storing items in a dictionary and wanted to erase them after a timeout.

I created the following collection:

public class ExpireDictionary<T1, T2> : IDictionary<T1, T2>
    {
        // The collection that holds the dictionary paired with a DateTime value to track expiration
        private System.Collections.Concurrent.ConcurrentDictionary<DateTime, KeyValuePair<T1, T2>> collection = new System.Collections.Concurrent.ConcurrentDictionary<DateTime, KeyValuePair<T1, T2>>();

        // The TimeSpan after which an item in the dictionary is expired and can be removed.
        private TimeSpan expiration;

        // The timer used for removing expired elements
        private Timer timer;

        // Initializes a new instance of the ExpireDictionary class.
        public ExpireDictionary(int intervalField, TimeSpan expirationField)
        {
            this.timer = new Timer();
            this.timer.Interval = intervalField;
            this.timer.Elapsed += new ElapsedEventHandler(this.Tick);
            this.timer.Enabled = true;
            this.timer.Start();

            this.expiration = expirationField;
        }

        // The TimeSpan after which an item in the dictionary is expired and can be removed.
        public TimeSpan Expiration
        {
            get { return this.expiration; }
            set { this.expiration = value; }
        }

        // The interval in milliseconds used for verifying the list and removing expired items.
        public int Interval
        {
            get { return (int)this.timer.Interval; }
            set { this.timer.Interval = value; }
        }

        // The handler for the event Elapsed of the timer
        private void Tick(object sender, EventArgs e)
        {
            foreach (var kp in this.collection.Keys.ToList())
            {
                if (DateTime.Now - kp >= this.expiration)
                {
                    KeyValuePair<T1, T2> removedKeyValuePair;
                    this.collection.TryRemove(kp, out removedKeyValuePair);
                    Console.WriteLine("removed element '{0}'", kp.ToString("yyyy.MM.dd HH:mm:ss:ffff"));
                }
            }
        }
}

You can find the complete sources here.

There is plenty of room for improvement to the above solution, so please feel free to comment.

Later Edit: You might want to reconsider the key type of the private dictionary used here. I recently had a case where the precision of DateTime.Now wasn’t sufficient and it resulted in some ugly bugs where elements in the dictionary were overwritten.

PostSharp – Simple profiling aspect

I recently came across an example of how to use PostSharp to create a profiling aspect (source).

The following example takes advantage of the OnMethodBoundaryAspect class.

    [Serializable]
    [ProfilerAspect(AttributeExclude = true)]
    public class ProfilerAspect : OnMethodBoundaryAspect
    {
        public override void OnEntry(MethodExecutionArgs args)
        {
            args.MethodExecutionTag = Stopwatch.StartNew();
        }

        public override void OnExit(MethodExecutionArgs args)
        {
            Stopwatch sw = (Stopwatch)args.MethodExecutionTag;
            sw.Stop();

            string output = string.Format("{0} Executed in {1} milliseconds",
                                args.Method.Name, sw.ElapsedMilliseconds);

            System.Diagnostics.Debug.WriteLine(output);
        }
    }

Apply the aspect on the assembly:

[assembly: ProfilerAspect()]

If you choose to apply the aspect on the entire assembly, set the AttributeExclude to true on the aspect itself.
Don’t forget to reference the PostSharp assembly…and it’s done.

Dynamic custom type information

Have you ever wondered how could you define custom properties at runtime? I didn’t… but recently I came across this issue.
The interface ICustomTypeDescriptor came to save the day. This interface is used to add custom type description outside of what the standard TypeDescriptor provides. If ICustomTypeDescriptor is not used, the default behaviour is given by a static TypeDescriptor at runtime, which provides type information based on the meta data obtained via reflection.

Let’s get to the code (here are the sources):github

The PropertyGrid is widely used to display an object’s properties and values. I used this control in a WPF application to prove the utility of using this interface.

<Window x:Class="TestCustomProperty.MainWindow"
        xmlns="http://schemas.microsoft.com/winfx/2006/xaml/presentation"
        xmlns:x="http://schemas.microsoft.com/winfx/2006/xaml"
         xmlns:swf="clr-namespace:System.Windows.Forms;assembly=System.Windows.Forms"
        Title="MainWindow" Height="350" Width="525">
    <Grid>
        <WindowsFormsHost    Name="windowsFormsHost1"   >
            <swf:PropertyGrid x:Name="propertyGrid"/>
        </WindowsFormsHost>
    </Grid>
</Window>

In code-behind:

public partial class MainWindow : Window
    {
        public MainWindow()
        {
            InitializeComponent();
            this.Loaded += this.Window_Loaded;
        }

        private void Window_Loaded(object sender, RoutedEventArgs e)
        {

            MyClass c = new MyClass();
            propertyGrid.SelectedObject = c;
        }
    }

Initially MyClass has only two properties:

public class MyClass
    {
        public string Name { get; set; }
        public int Nr { get; set; }

        public MyClass()
        {
            Name = "sss";
            Nr = 1;
        }

    }

With these two properties, the result looks something like this:

Here comes the interface ICustomTypeDescriptor in handy.
The interface implementation consist of a lot of methods that I didn’t need. The heart of the whole thing is the GetProperties method. The purpose of this method is to return a PropertyDescriptorCollection that describes all of the properties of the object.

public class DictionaryPropertyGridAdapter : ICustomTypeDescriptor
    {
        IDictionary _dictionary;
        public DictionaryPropertyGridAdapter(IDictionary d)
        {
            _dictionary = d;
        }

        public DictionaryPropertyGridAdapter()
        {
            _dictionary = new Hashtable();
        }
        public AttributeCollection GetAttributes()
        {
            return TypeDescriptor.GetAttributes(this, true);
        }

        public string GetClassName()
        {
            return TypeDescriptor.GetClassName(this, true);
        }

        public string GetComponentName()
        {
            return TypeDescriptor.GetComponentName(this, true);
        }

        public TypeConverter GetConverter()
        {
            return TypeDescriptor.GetConverter(this, true);
        }

        public EventDescriptor GetDefaultEvent()
        {
            return TypeDescriptor.GetDefaultEvent(this, true);
        }

        public PropertyDescriptor GetDefaultProperty()
        {
            return null;
        }

        public object GetEditor(Type editorBaseType)
        {
            return TypeDescriptor.GetEditor(this, editorBaseType, true);
        }

        public EventDescriptorCollection GetEvents(Attribute[] attributes)
        {
            return TypeDescriptor.GetEvents(this, attributes, true);
        }

        public EventDescriptorCollection GetEvents()
        {
            return TypeDescriptor.GetEvents(this, true);
        }

        public PropertyDescriptorCollection GetProperties(Attribute[] attributes)
        {
            ArrayList properties = new ArrayList();
            foreach (DictionaryEntry e in _dictionary)
            {
                properties.Add(new DictionaryPropertyDescriptor(_dictionary, e.Key));
            }

            PropertyDescriptor[] props =
                (PropertyDescriptor[])properties.ToArray(typeof(PropertyDescriptor));

            return new PropertyDescriptorCollection(props);
        }

        public PropertyDescriptorCollection GetProperties()
        {
            return ((ICustomTypeDescriptor)this).GetProperties(new Attribute[0]);
        }

        public object GetPropertyOwner(PropertyDescriptor pd)
        {
            return _dictionary;
        }

        public void AddProperty(object key, object value)
        {
            _dictionary.Add(key, value);
        }
    }

You will also notice in the GetProperties method that the Property Descriptors added for the dictionary entries are of type DictionaryPropertyDescriptor. This is a custom Property Descriptor class that manages how properties are set and retrieved. The main methods to look at on this class are GetValue and SetValue. Here you can see the component being casted as a dictionary and the value of the key inside it being set or retrieved. Take a look at the implementation below:

public class DictionaryPropertyDescriptor : PropertyDescriptor
    {
        IDictionary _dictionary;
        object _key;

        internal DictionaryPropertyDescriptor(IDictionary d, object key)
            : base(key.ToString(), null)
        {
            _dictionary = d;
            _key = key;
        }
        public override Type PropertyType
        {
            get { return _dictionary[_key].GetType(); }
        }

        public override void SetValue(object component, object value)
        {
            _dictionary[_key] = value;
        }

        public override object GetValue(object component)
        {
            return _dictionary[_key];
        }

        public override bool IsReadOnly
        {
            get { return false; }
        }

        public override Type ComponentType
        {
            get { return null; }
        }

        public override bool CanResetValue(object component)
        {
            return false;
        }

        public override void ResetValue(object component)
        {
        }

        public override bool ShouldSerializeValue(object component)
        {
            return false;
        }
    }

I modified MyClass so that it derives from the DictionaryPropertyGridAdapter and added the initial properties of the class to the dictionary in the constructors. I guess there is a better way to do this. Please fell free to comment with another solution.

public class MyClass : DictionaryPropertyGridAdapter
    {
        public string Name { get; set; }
        public int Nr { get; set; }
        public MyClass(IDictionary d) : base(d)
        {
            Name = "sss";
            Nr = 1;
            foreach (PropertyInfo pi in typeof(MyClass).GetProperties())
            {
                d.Add(pi.Name, pi.GetValue(this, null));
            }
        }

        public MyClass():base()
        {
            Name = "sss";
            foreach (PropertyInfo pi in typeof(MyClass).GetProperties())
            {
                this.AddProperty(pi.Name, pi.GetValue(this, null));
            }
            Nr = 1;
        }

    }

I added the other properties in code-behind:

private void Window_Loaded(object sender, RoutedEventArgs e)
        {

            MyClass c = new MyClass();
            c.AddProperty("hello","world");
            c.AddProperty("testint", 2);

            propertyGrid.SelectedObject = c;
        }

Here is the end result:

Sources: MSDNsource1, source2, source3

PostSharp – Exception handling

This is the first issue PostSharp helped me with – adding exception handling policies, without modifying the business code.

The example below is the one provided in the PostSharp Principles tutorial.
Based on this example, here is a quick cookbook to add exception handling:

1. PostSharp provides an abstract class for the exception handling OnExceptionAspect. Create an attribute that derives from OnExceptionAspect:

[Serializable]
public class DatabaseExceptionWrapper : OnExceptionAspect
{
    public override void OnException(MethodExecutionArgs args)
    {
        string msg = string.Format("{0} had an error @ {1}: {2}\n{3}",
            args.Method.Name, DateTime.Now,
            args.Exception.Message, args.Exception.StackTrace);

        Trace.WriteLine(msg);

        throw new Exception("There was a problem");
    }

    public override Type GetExceptionType(System.Reflection.MethodBase targetMethod)
    {
        return typeof(InvalidOperationException);
    }
}

The GetExceptionType method is called at compile time and sets the type of exception the aspect is going to handle, in this case InvalidOperationException. This method is used for writing the try/catch block that will wrap after compilation the content of the method decorated with the attribute [DatabaseExceptionWrapper].

The OnException method is called when an unhandled exception, that matches the type specified in GetExceptionType, occurs in the target method.

2. Aplying the aspect to a method:

[DatabaseExceptionWrapper]
public IQueryable GetByName(string value)
{
    var res = _contactStore.Where(c => c.FirstName.Contains(value)
                || c.LastName.Contains(value));

    if (res.Count() < 1)
    {
        ThrowNoResultsException();
    }

    Thread.Sleep(3000);
    return res.AsQueryable();
}

3. PostSharp will wrap the target method in a try/catch where the code we provided will be placed in the catch.
The result after compilation (thank you ILSpy):

public IQueryable GetByName(string value)
{
    IQueryable result;
    try
    {
      IEnumerable res =
        from c in InMemoryDataStore._contactStore
        where c.FirstName.Contains(value) || c.LastName.Contains(value)
        select c;
      if (res.Count() < 1)
      {
         this.ThrowNoResultsException();
      }
      Thread.Sleep(3000);
      IQueryable queryable = res.AsQueryable();
      result = queryable;
    }
    catch (InvalidOperationException exception)
    {
      MethodExecutionArgs methodExecutionArgs = new MethodExecutionArgs(null, null);
      MethodExecutionArgs arg_70_0 = methodExecutionArgs;
      MethodBase m = InMemoryDataStore.z__Aspects.m2;
      arg_70_0.Method = m;
      methodExecutionArgs.Exception = exception;
      InMemoryDataStore.z__Aspects.a0.OnException(methodExecutionArgs);
      throw;
    }
    return result;
}

Windows 8 Wireframes

Here’s a basic problem. I’m trying to design my first store application on Windows 8 and I could use some tools for creating the wireframes.

The catch is that I’ve been a Mac user for a while and I’m not sure about how an windows 8 store application should feel and act. I can count my experience with Windows 8 in hours. You’re wondering why a Mac user is developing an Windows 8 app and tries to create the wireframes on Mac OS? I’m asking myself the same question.

To my defence, I’ve been impressed with what OmniGraffle can do and I wanted to use it for the wireframes. I found a great stencil for windows 8.

I am aware of the benefits of designing an Windows store app directly on Windows, but I haven’t found any worthy alternative for OmniGraffle on Windows. If you have any suggestions, please feel free to comment.

As for the “feel and act” part of the problem, the Design guidance for Windows Store apps from MSDN was a good starting point for me.

Happy wireframing!